

 Artists Decorating Race Cars 2021 – Car Art Trends, Styles, and Highlights">

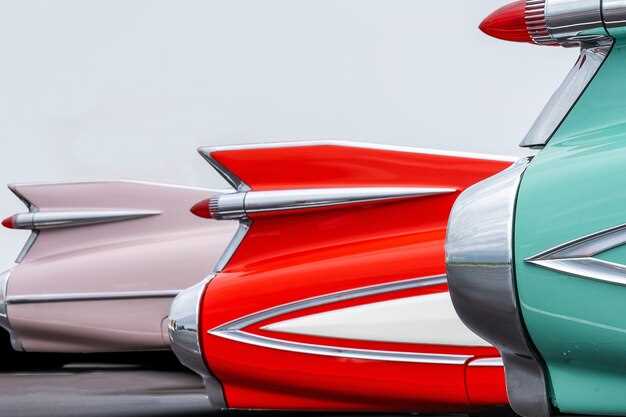
Choose a bold, high-contrast color palette to ensure your race-car wrap pops on the track and through the channel. In 2021, artists favored clear, fast-read motifs–large shapes, simple silhouettes, and concise text–that communicate at speed and from the stands. This approach shines when light bounces off chrome and matte finishes, especially near windows and under floodlights, where colors can shift and still stay legible.
mascitti et bernadette brought distinct styles to the subjects they painted, collaborating with assisting teams to craft a single cohesive piece. Designers map the layout with the left side as the hero, then balance it with a central motif and trailing text bands. The workflow in the studio relies on sketches and prototypes, and the wrap is designed to flow with the car’s curves before the team moves to the wrap bay for application.
In england and across the highland regions, designers tested monochrome bases paired with a single vivid accent. The left side often carries the main hero, while the right builds rhythm with color blocks and bold typography. Working with sponsors and crews, teams coordinate the look with the calendar of events so the livery remains cohesive across media and stages. A smiling child in the crowd becomes a gauge for readability; if a child can identify the hero motif, the design passes the test on the hill-climb screens and in broadcasting.
To recreate these looks, teams structure wraps as a modular calendar of panels: a central piece, side panels, and header bands that can be rearranged as needed. In the office and workshop, designers test samples on mock cars to ensure the pattern reads at different distances, from the house windows to the spectator decks. Creating a strong identity for the 2021 season relies on crisp edges, controlled textures, and careful alignment with sponsor channels.
Sketch-to-wrap workflow for mountain-range inspired designs
Lock the palette and create a vector base of the mountain silhouette before adding texture. This approach keeps the wrap coherent across panels and reduces revision cycles in the shop.
Use google to source reference mountain profiles, then pick five to seven silhouettes that cover the range from base to apex. Draw the initial outlines in a vector program and trace a piece of geometry through the following steps, which roots the design in known forms and gives a general framework to work from. These works mainly aim to define a clean feature line that reads from distance to the foreground.
Choose a pastel palette (pastels) to keep the design legible at scale on vinyl. This approach helps a racing scheme avoid loud clashes and yields a posh, modern feel. Build color in layers, with a midtone gradient that suggests distance and a foreground ridge that pops. The gradient lines form a song across the silhouette, adding rhythm without noise. The following color rules keep the composition readable: use higher contrast on edges, and keep textures minimal to preserve clarity across panels.
Export to scalable files and test on computers with a wrap simulator to verify distortion on curved surfaces. Talking with the team keeps options aligned; introducing a crossover motif that bridges landscape art and racing graphics helps the final piece read across panels. A musician may inform the rhythm of stroke and spacing, and phil notes that always check the design in the office before a final proof. Sometimes you may adjust texture depth for readability; in client reviews, several concepts competed, reinforcing the endurance-focused approach that trades breadth for clarity. Here you assemble the final assets with confidence.
Output and proofing
Convert to scalable vectors, deliver AI/EPS with bleed, and provide a bitmap proof for client viewing. Use computers to simulate wrap behavior and confirm legibility from distance and angle. The following checks ensure the main idea survives distortion: validate the feature line against panel curves, confirm color consistency across lighting, and verify that the piece remains recognizable when panels are viewed in sequence.
Collaboration notes
Involve phil early to keep the musician-driven rhythm from overwhelming the general composition. Talking through options helps align on priorities; introducing this workflow as a repeatable method supports a crossover between art and race branding. Always align on deliverables and timelines, and share the tests in the office for cross-team feedback. Here is a practical path that teams can follow, sometimes refining based on client input, to produce a racing-wrap that endures on the road and in trade show display.
Best color palettes for mountain-inspired race wraps
Start with a triad: forest green (#1B5E20) as the main field, slate gray (#2F2F2F) for panels, and alpine blue (#2F8EF0) for accents, with white logos (#FFFFFF) for contrast. This combination reads as rugged, maintains legibility at speed, and stays vibrant under lights.
Palette option 1, called Mountain Crest, uses base green (60%), gray (30%), and blue (10%). Apply a white logger stripe along the roof line and finish sponsor marks in copper (#B87333) to stand out on dark surfaces. This approach is easier for shops to execute and translates well into films and on-track footage, supporting marketing goals in america and beyond.
Palette option 2, called Rock Pass, leans on a graphite base (#2F2F2F) with moss green (#4A7B2D) and glacier blue (#A9D3F7). Use bright accents (#FFC107) for visibility on numbers and sponsor blocks. The contrast maintains readability on all channels, from race numbers to digital screens, and aligns with sponsor guidelines common in america.
Palette option 3, Generative Peak, blends a vertical gradient from forest green to slate gray to alpine blue, producing a dynamic look that reads well in motion. Use a subtle micro-gradient along edges and a logger motif in the lower panel to anchor the composition. This approach often results from studying color psychology and testing on computers before printing, and it translates to bernadette’s team shoots and sponsor reels, combining creativity with practical marketing.
Implementation tips: start with a basic set of options and test under studio lights and in real-world racing scenarios. Build a quick list of palettes and involve a team member and a dedicated channel for sponsor feedback; the logger will track which design performed best under different subjects and lighting conditions. We knew from studying that america needs simpler workflows, so include bernadette and the marketing crew early. Studying color behavior across films, computers, and live runs helps you finalize palettes that teams competed with in local events. This always yields clearer branding, with options that teams would use and scale mainly for marketing, from local clubs to national series.
Signature motifs: mountains, pines, lakes, and alpine wildlife
Place mountains as the central crest across the doors; this is the first move that guides the rest, then tuck pines along the rocker line, and add a restrained lakeside detail toward the rear to suggest depth without crowding the side.
Color strategy relies on a tight palette: three core tones plus two accents. Use cool blues for water, forest greens for pines, and charcoal for rock textures; apply white highlights for snow or glare. Add a daytona-inspired gloss on the main crest to maximize visibility under track lights, and keep the same lighting treatment across the coupe for a cohesive read. Use mcqueens-inspired color breaks to reinforce structure without clutter. super crisp lines help with durability and legibility.
Keep one item as a reference: the anchor motif stays fixed while others adapt.
- Anchor motif: mountains across the door panels create a strong, uninterrupted silhouette.
- Supporting elements: pine silhouettes rise from the lower panels to guide the eye upward.
- Depth cue: a simple lake reflection line in the midsection signals distance without over-detailing.
- Accent details: small alpine wildlife icons near the rear quarter provide a playful spot without stealing focus.
- Define the anchor motif and test legibility from 2–4 meters.
- Layer pine silhouettes and lake reflections to support the main crest.
- Apply generative textures in controlled areas to add depth without muddling shapes.
- Proof with mockups from multiple angles; click through to spot issues and iterate.
- Finalize with daytona gloss edges and mcqueens-inspired color blocks for a cohesive finish.
Guard against sully on the finish by keeping edges clean during wrap application.
This workflow benefits designers, studios, and careers teams, convincing audiences with a totally readable, alpine vibe. It is rooted in highland references and tested on real-track stages.
Paints, coatings, and UV protection for long-lasting brightness
Use a UV-stable, aliphatic polyurethane clear coat with ceramic additives as the final layer, and recoat every 6–12 months when a car spends long days under direct sun. This approach preserves brightness on Daytona track artwork for most cars and in show garages, where light exposure is intense.
Base systems offer durability without sacrificing gloss: a high-solids two-stage polyurethane, or an acrylic urethane base with a tough, clear overcoat. For lettering and automotive graphics, which require crisp lines, choose enamel or urethane bases with excellent abrasion resistance. Aliphatic formulations stay clearer longer than aromatic ones, protecting artwork on cars from yellowing after hot track days. In some shops this top layer is called a ceramic-clear and is designed to protect color for the long haul.
Historically, the lettering trade started because teams needed visuals that could withstand sun and rain. Several studios explored new methods, and mannings studios went from a house operation to a full workshop, where expert technicians tested adhesion on vinyl wraps and painted panels. Lightning-fast sun exposure at venues like Day tona makes a ceramic top coat especially valuable for most projects, keeping edges crisp and colors bold.
Application and upkeep require discipline: sand between coats, keep the temperature around 20–25°C, and humidity near 40–60%. Use a tack cloth, apply even passes, and allow appropriate flash times so edges do not lift. For wraps, seal edges with a compatible primer and finish with an overlaminate if possible; for painted panels, ensure the topcoat bonds near decals and lettering. After application, store color references and formulas in a shared system so teams who worked on the project can access them, because this support maintains consistency across careers and locations.
Maintenance schedule and routine care protect brightness: wash with a pH-neutral soap, avoid chlorine cleaners, and dry with a microfiber towel. Apply a ceramic or polymer sealant every 3–6 months and recoat after prolonged sun exposure or track use. Most crews coordinate with a farm-gate or shop-side detail crew, keep a oils-free cleaning routine, and document performance in a simple log. By following these steps, lettering stays sharp and automotive graphics retain their legibility from the first Daytona appearance to the final checkered flag.
Step-by-step application: masking, layering, vinyl wrap, and final seal
Mask edges tightly with quality painters’ tape before any cut-and-apply work to ensure crisp lines and minimize rework. This classic approach keeps the finish clean on every all-new design and lets you manage details without guesswork. If you’re thinking about a proven workflow, bring in the assistant and the manager to mark reference points, and let the musician on the team help set a rhythm for the decorating process. Before you begin the wrap, test alignment on a spare panel and compare with the file from the designer to guarantee accuracy. Regardless of car shape, careful masking now saves time later.
Its objective is simple: protect panels, preserve color, and keep edges sharp. The explainer notes that this needs precision, whether you’re adapting a former wrap or an all-new layout. Ainsworth and Blake pair their notes in coursework with a dedicated logger to track iteration steps, and the team enjoys keeping records for future projects. This prep work, done before the wrap goes on, reduces sully risks on high-contrast graphics and ensures you can move quickly through the subsequent stages.
Materials and prep
Use low-tack masking film for complex curves, a soft squeegee for burnishing, and a lint-free cloth for surface prep. Clean the panel with isopropyl alcohol, dry thoroughly, and inspect for dust or oil. The explainer emphasizes consistency in application so that from edge to edge the color remains uniform. This step benefits a team that lived through different wrap attempts and now pursues a classic, all-new finish. Ainsworth’s notes, along with montandons’ logger records, guide the alignment process and help a young crew stay coordinated. The needs of the project require a calm, methodical approach before any vinyl touches the panel.
Execution steps
Layer the base color, then midtones and highlights in thin passes. Allow 5–12 minutes between layers in a ventilated space. Think of the work as timing a performance: a musician on the crew keeps a steady pace, and thinking ahead prevents rushed mistakes. After the base dries, position the vinyl wrap with the guides; apply heat at 80–90°C to conform, and roll from center outward to push air toward the edges. Avoid stretching more than 5% to prevent distortion, and recheck alignment under track lights before final adhesion. When the graphics settle, trim any overlap at door seams and around lights for a clean edge.
Final seal
Install a UV-resistant clear laminate at 2–3 mils total thickness for a durable shield. Work in cool, shaded conditions to prevent heat-induced bubbling, and cure per the laminate spec. Recheck all seams, then wipe edges with a microfiber cloth and re-squeegee if needed. Regardless of the design, run a quick inspection under bright lights to confirm even gloss and absence of micro-bubbles. Eventually, you’ll finish a wrap that looks totally integrated with the car’s shape and lighting, with incredibles detail that impresses teammates and sponsors alike.
| Stage | Action | Tools | Tips |
|---|---|---|---|
| Masking | Apply mask film, burnish edges, create clean bleed | mask film, squeegee, edge tracer | Test on scrap panel first; keep bleed around 0.5–1 mm |
| Layering | Base color, midtones, highlights in thin passes | soft brushes, microfiber cloth | Wait 5–12 min between layers; avoid dust |
| Vinyl wrap | Position, align to guides, heat-conform, remove air | heat gun, roller, cutters | Work center-out; don’t over-stretch |
| Final seal | Laminate application, cure, edge trim | UV laminate, rollers, microfiber | Check under lights; fix lifts immediately |
Notes: This process sequence supports a former project turning into a fresh, all-new appearance that stands up to the track environment. It suits a team that enjoys decorating and values predictable results, regardless of room size or panel curvature. The step-by-step structure helps a manager coordinate tasks, a logger document changes, and a musician keep a steady tempo, with coursework-backed references guiding best practices from ainsworth to montandons.