

 On the Seams – The Ultimate Guide to Stitch Techniques and Sewing Tips">

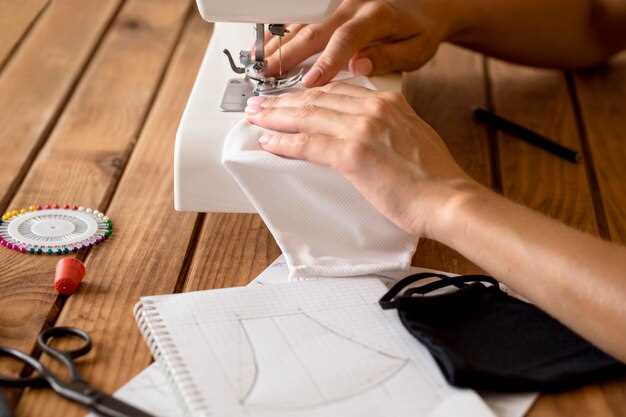
Start by selecting the right needle, thread, and stitch for your fabric. This concrete choice sets the pace for your project and keeps hubs of tips from going astray after you press the first seam. For woven cottons use a sharp needle size 70/10, or 80/12 for lighter fabrics, and pair with a sturdy polyester thread. For knits, choose a ballpoint needle and a stretch twin needle when appropriate. The result is neat seams that hold up after washing and wear.
Progress with the fundamentals: straight stitch, backstitch, and zigzag cover most projects. Practice each on a scrap, then test seam strength by tugging near the edge. If the seam opens after washing, adjust tension and stitch length instead of re-cutting the fabric. Single-handedly achieving clean stitches comes from consistent pressure, slow speed, and calm feeding–let the fabric guide your hands, not the other way around. Tackle setbacks differently to keep the learning curve smooth.
Choose finishing methods that suit the fabric and wearer. For sheer fabrics, use a narrow French seam; for denim, add topstitching and a sturdy back seam. Unele projects benefit from under-stitching to keep linings in place. Note how a small difference in seam allowance (about 0.25 cm) changes the fit and durability near the zipper area. Sophisticated finishes like bias binding can elevate a simple tee, but require precise measuring.
Keep your machine clean with a soft brush and a set of toothbrushes to clear lint from the bobbin area; this habit prevents skipped stitches and incomplete feed. Clean under the needle plate after every project so lint does not accumulate and twist. A quick wipe with a microfiber cloth also helps keep tension even. After maintaining these habits, you’ll notice fewer headaches at the sewing table.
Tailor tips for fabrics and client expectations. When you explain the plan to a buyer, describe how stitches behave under real wear: leather needs backstitching; silk needs gentle handling; canvas benefits from reinforced seams. The arizona heat can affect fabric behavior, so pre-wash or pre-shrink fabrics to avoid surprises. Those preparation steps help contracts between you, your fabric, and your client stay intact after wear and wash.
Commitment to daily practice accelerates mastery. Track your progress by noting which stitches you picked for each project and which ones felt incomplete or caused issues. When a seam fails, re-evaluate tension and stitch type, not the entire plan; this awareness helps you recover quickly after mistakes. If you lost confidence on a stubborn fabric, switch to a simpler project and then return with a fresh mindset. Those small wins build near perfect results over time.
Stitch Selection by Fabric Type: Silk, Cotton, Denim, Knit
For silk, stitch with a narrow straight stitch of 2.0–2.5 mm using a 60/8 needle and finish edges with a French seam to fully enclose raw edges. Support fibers with tissue under the seam and use a walking foot to prevent slipping on slippery fabric. This approach keeps puckering low and is used by experts in home studios and larger operations along the chain of production, with materials sometimes moving by planes or USPS to keep what’s needed available.
Cotton responds well to a mid-weight setup: a straight stitch of 2.5–3.0 mm, needle 80/12, and backstitch at the start and end. Finish edges with a narrow zigzag or overlock, press seams open for a flat view, and rely on a small, steady tension. These guidelines appear in a sortable list classified by cotton weight and finish, shared by staff in warehouses across cities to streamline operations; invested makers reference tags and notes to stay aligned with what’s used in retail, home sewing, and studio work.
Denim demands a robust approach: stitch length 3.0–3.8 mm, needle 90/14 or 100/16, and a topstitch or chain-style finish for outer seams. Reinforce pockets and fly areas with extra stitches, seal raw edges with a wideOverlock or heavy zigzag, and allow seam allowances of 1.0–1.5 cm. Seams should be heavily reinforced on multiple layered panels in heavily packed garments, and the view from the factory floor shows these methods spread across cities and warehouses as part of the supply chain plan that experts supervise and staff execute with precision; such steps are often tagged and classified to keep the workflow smooth.
Knits require stretch-friendly stitches: use a stretch or three-step zigzag at 2.5–3.0 mm, pair with a ballpoint or stretch needle (70/10–75/11), and enable a walking foot or serger for clean edges. For hems, employ a twin needle to maintain elasticity without sag, and avoid straight stitches that restrict movement. Test on scrap first, then apply to home projects or shop floors. These knit tips help seams stay flexible, with the spread of knowledge across teams, warehouses, and plans that keep operations steady and shipments flowing through the chain with confidence.
Hand Stitch Techniques: Running, Backstitch, Slip
Start with a 2-3 mm running stitch for long seams; use a sharp needle and 1 strand of cotton thread; secure ends with two backstitches. If your project begins in october in a city studio, mark seam lines on the ground with chalk and keep the vision of a clean line intact as you sew.
Running stitch specifics: this method stays fast for large volumes of fabric. Maintain stitch length at 2-3 mm, use a single thread, and keep tension so the line lies flat without gaps. Anchor the tail by weaving under the first two stitches. When you work on stacks of fabric, divide the work into 20-40 cm blocks to prevent drift. Weve found that working in blocks reduces misalignment as fabric moves between co-located stations and teams, while preserving a consistent look across the same project.
Backstitch approach: for a durable edge, stitch forward a short amount, then return to the previous hole to fill it, repeating along the seam with 3-4 mm stitches. Begin with a small lock at the edge, then keep each stitch evenly spaced. This method suits pockets, cuffs, and hems where wear is likely; adjust to the sizes of the pieces you’re joining and maintain a steady rhythm so the line remains straight and clean throughout the run.
Slip stitch technique: use an invisible finish to close openings or hems from the wrong side. Bring the needle up from behind the fold, catch only a tiny bit of the outer fabric, and exit close to the edge in 1-2 mm increments. Align the seam so the outside appears seamless, and hide knots on the inside. This stitch works best when the fabric has a smooth surface and a clear fold line, helping the final look stay crisp across all sizes.
Operational workflow note: plan with the workshop’s logistics in mind. October shipments often involve parcels moving through time windows, so label each piece and send updates as you complete a block. For efficiency, keep co-located stations that handle the same stitch set, and track from ground to house to parcel with simple checklists. A high-quality run relies on a clear vision, sturdy threads, and consistent tension, with program feedback spoken openly by team members to improve the overall process from start to finish.
Seam Finishes for Strength: French, Overlock, Hong Kong
Recommendation: Use French seams for areas that move or are visible inside the garment; they fully enclose the edge and boost durability without bulk. For light to mid-weight fabrics, start with a 6 mm (1/4 in) seam with wrong sides together, trim, then finish with a second pass that encloses the edge. This approach distributes stress throughout the seam and across the fabric, delivering long-lasting performance in high-movement areas such as underarm seams. The method aligns with code-minded standards and supports markets worldwide, ensuring a strong inside finish they can trust. A footage reel from a tennessee studio shows the difference after 500 wash cycles.
French seam technique
Step 1: Sew with wrong sides together at about 6 mm (1/4 in).
Step 2: Trim the seam to roughly 2–3 mm (1/8 in to 1/8 in).
Step 3: Press, then fold so wrong sides meet again and sew a second pass along about 6–8 mm (1/4 in to 5/16 in) to enclose the edge fully. This separate, double-sew approach spreads the load evenly across elements and yields a neat finish across areas that move most.
Overlock and Hong Kong finishes: when to apply
Overlock (serge) finishes work well on knit fabrics and fray-prone weaves. Use a 3-thread setup for lighter fabrics and a 4-thread setup for heavier ones. Sew close to the edge (about 3–5 mm) and keep stitch length in the 2.5–3.0 mm range to avoid bulk; this boosts efficiency by speed while maintaining edge integrity. For highly stressed seams, pair an overlock with a light topstitch on the outside to spread the load and prevent stretching.
Hong Kong finishes reinforce the seam allowance with bias binding. Cut binding 9–12 mm wide, wrap the seam allowance, and stitch close to the edge. This finish adds strength to collars, hems, and waistbands while delivering a clean interior look. It’s particularly effective in areas where you want a controlled bend and a crisp edge, such as shirts, jackets, and tailored skirts.
To manage non-sortables and keep processes clear, maintain a sortable chart of finishes by fabric type and area (shoulder, sleeve, hem). This helps you move from remaining tests to a fully repeatable method. When you purchase a serger, ensure it handles 3- and 4-thread operations and offers adjustable stitch width for precise overlock work. Marc led the Hebron-based trials and reviewed footage that tracked performance across a decade, confirming the benefit of these finishes for durable, market-ready garments across much of the markets. Commit to a consistent in-house standard, and the result stays strong throughout wear, wash, and reuse.
Tips for Accurate Seams: Basting, Alignment, Pins, and Seam Allowance
First, baste the seam with long, even stitches (about 6–8 mm) before any machine work. Believe this quick step makes the job straightforward and takes the guesswork out of alignment, making cleaner joints. Use a contrasting thread so you can see the basting lines and remove them immediately after you verify the fit. Have a spare needle and thread for hand-basting, having scraps ready to check how the fabric behaves. In january, practice this on cottons and light fabrics; these routines pay off when you switch to heavier blends. This preparation keeps edges aligned through pressing, sewing, and handling, so you break less thread and keep the line tidy. This approach works for projects across cities and even in arizona studios where good light helps you track folds through the fabric.
Basting and Pins
Place pins 1–2 cm apart along the edge, perpendicular to the seam line. Align notches and marks, then check that both layers lie flat and the raw edges meet. For curved edges, add pins more frequently (about every 1 cm) to prevent shifting. Use fine glass pins for delicate fabrics; remove pins as you sew, just ahead of the needle. If you work with several layers or slippery fabrics, consider a third-party temporary spray or chalk marker and test on scraps first. Having a dedicated pin cushion and a magnetic picker helps when you’re moving between pieces in cities across the country. Do rapid checks after basting to confirm alignment before you stitch the final line. Concerning heavy or expanded fabrics, keep pins steady to avoid drift.
Alignment and Seam Allowance
Set a consistent seam line with a guide; most garment seams use 5/8 inch (1.6 cm). For lightweight fabrics, 1/4 inch (6 mm) may be enough; for heavy fabrics like denim or wool blends, 1/2 inch (12 mm) helps prevent bulk. Check pattern notes and, if needed, adjust for pounds-per-yard fabric, especially with imports. If fabric imports or overseas carriers arrive, pre-wash or test shrinkage on a scrap to confirm the final fit. Always confirm that the edge to be joined runs straight through the piece; first verify the edge is true, then re-align and re-pin. For curved seams, ease the fabric gently and trim back tails so the seam sits flat on the side. Introduction of small checks, such as a swatch, speeds deployment of good seams and reduces rework later. Sometimes you’ll find a small break in the line; address it before you stitch the full seam, making the final run smoother and enormous enough to withstand daily wear. Making sure you keep the grain aligned and the seam allowance consistent helps the result stay clean through repeated use.
Amazon Packaging Makeover: Materials, Recycled Content, and Reuse Design
Adopt a standardized, recyclable packaging system across all products within a month-long pilot, using corrugated cardboard with 70–80% post-consumer recycled content, soy-based inks, and water-based adhesives. Implement automated tagging to track material streams and ensure consistency from warehouse to retailer.
Material choices guide the effort. Primary outer boxes should be single-wall corrugated, curbside recyclable, and sized to minimize waste in warehousing and shipment. Use recycled paper for liners and padding, avoiding plastic foams where possible. Inks should be water-based or soy-based to ease recycling, and closures should rely on easily removable tape or low-residue adhesives. For inner packing, consider molded pulp or paper pillows made from recovered fiber, which press close to products and reduce weight while protecting products throughout transit.
- Material: corrugated cardboard with high PCR content, recyclable inks, and compostable tapes where feasible.
- Recycled content: target 70–80% PCR for outer boxes, 50–70% for internal padding, with a plan to raise over time.
- Adhesives and inks: water-based, soy-based where possible; avoid PVC-based tapes.
- Padding: replace foam with molded pulp or recycled paper fillers to reduce waste.
- Labels and tags: use minimal, recyclable tags that can be removed by staff and customers without compromising the seal.
Reuse design focuses on longevity and ease of handling. Create a modular, nestable packaging set that can be returned or repurposed by nearby retailers and customers. Standardize the same dimensions across product lines to simplify stacking in house and in retail spaces, and design closures that are secure yet easy to reopen without tools. Include clear reuse instructions printed directly on the packaging to guide someone unfamiliar with the program.
- Structure: standard, nestable outer box with a reusable inner tray that can be repurposed as storage.
- Return flow: establish a simple, local loop with nearby retailers and warehouse partners to collect empty packaging.
- Instructions: concise reuse guidance printed on the container, plus a QR tag that directs customers to a reuse program page.
- Durability: select materials that tolerate multiple reuse cycles without significant performance loss.
- Closure: resealable or easy-open methods that preserve integrity during multiple uses.
- Launch a month-long pilot with a core product family, auditing material performance, recyclability, and customer uptake.
- Coordinate with staff at warehouses, distribution centers, and retail locations to locate common packaging sizes and reuse routes, using tags to find reusable lots and track return status.
- Engage suppliers to certify recycled-content claims, verify supply proximity to warehousing hubs, and ensure consistent print quality across regions.
- Implement a closed-loop workflow that captures packaging after use, with automated data capture touching warehousing, logistics, and retailer points of sale.
- Measure impact with concrete metrics: waste diversion rate, packaging cost per unit, and return-rate for reuse loops, adjusting the design based on data and feedback from staff and customers.
Practical tips to accelerate adoption. Choose a single house supplier for the core material mix to reduce variability, and negotiate a consortium deal with nearby retailers to share boxes during the pilot. The same packaging design should work across most products, minimizing SKUs and enabling faster production runs. If a specific product requires extra protection, add an optional, high-strength sleeve rather than a full redesign.
Experience matters. They can find that automated processes forego manual sorting later in the chain, while staff across warehousing, distribution, and retail benefit from consistent handling instructions. Someone should oversee ongoing quality checks and updates to the reuse routing, ensuring available materials stay within the loop and that possible bottlenecks are addressed in real time. Ultimately, the packaging makeover reduces waste, lowers transport weight, and strengthens the retailer’s sustainability story while keeping products protected and customers satisfied.